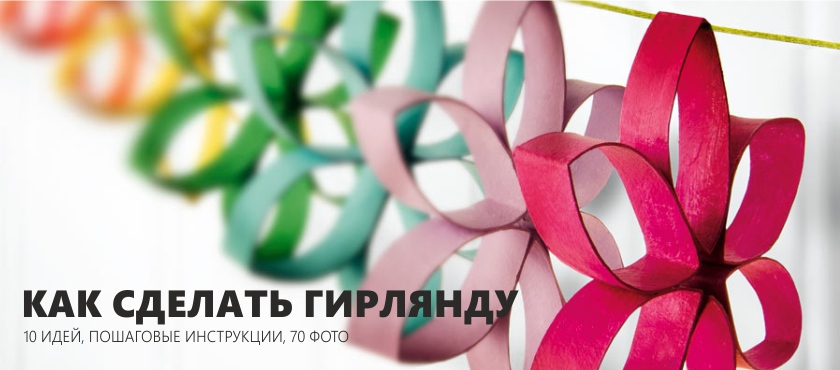
Garlands look great all year round, but are especially good for holidays - New Year, Easter, Birthday or Halloween. You can decorate the garland with walls, ceiling or windows of any room - from the kitchen to the children's room, as well as a Christmas tree or a mantelpiece. In this material we will show you 10 ideas with step-by-step master classes on how to make a garland with your own hands from improvised, natural and even junk materials.
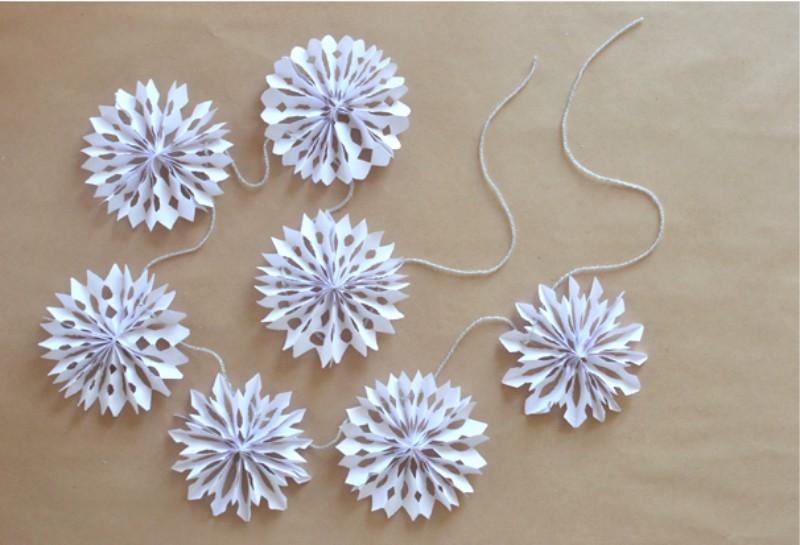
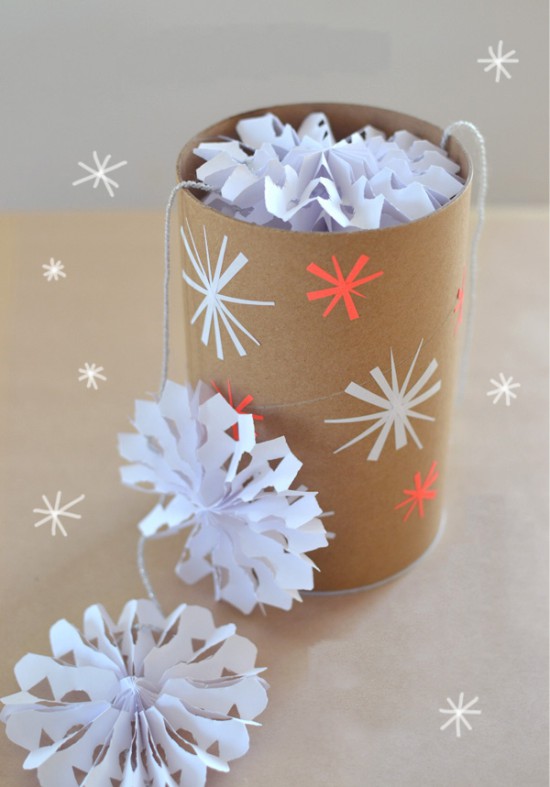
Christmas garland of bulk snowflakes
We present the first idea of making a garland for the New Year do it yourself - from snowflakes. Probably we all remember how to cut a flat snowflake from a square sheet of paper. This method will help you out if you need to make a garland as soon as possible. However, if you want to make a more elegant decoration, then we suggest to collect it from volumetric snowflakes. They are made somewhat longer and more complicated, but the resulting garland will survive more than one holiday.
Instruction:
Prepare paper, for example, ordinary office paper, pencil, scissors, stapler with staples, glue or double-sided tape and thread.
- Divide a sheet of A4 paper into two equal strips.
- Now collect each band in an accordion. This can be done in the following way: fold the strip in half, then fold the half in half again, then fold the quarter also in half and continue the action until the entire strip has folds. Next, focusing on the line of the folds assemble an accordion.

- Cut one small strip from your accordion, cut it in half, and then draw a pattern on it to cut the snowflake patterns. The pattern is drawn arbitrarily, but so that the edges of the assembled accordion in two or three places remain uncut. An example of a template can be seen in the upper right photo.
- Bend the harmonica in half and in the middle fasten it with a stapler.
- Use a pencil to circle the outline of the template on one of the halves of your workpiece, and then use scissors to cut the corresponding parts of the drawing.
- Repeat Step # 5 with the other half of the workpiece using the same template.
- Fan each half of your workpiece and glue the ends together.
- Hang medallions on snowflakes on a beautiful thread, for example, silver.
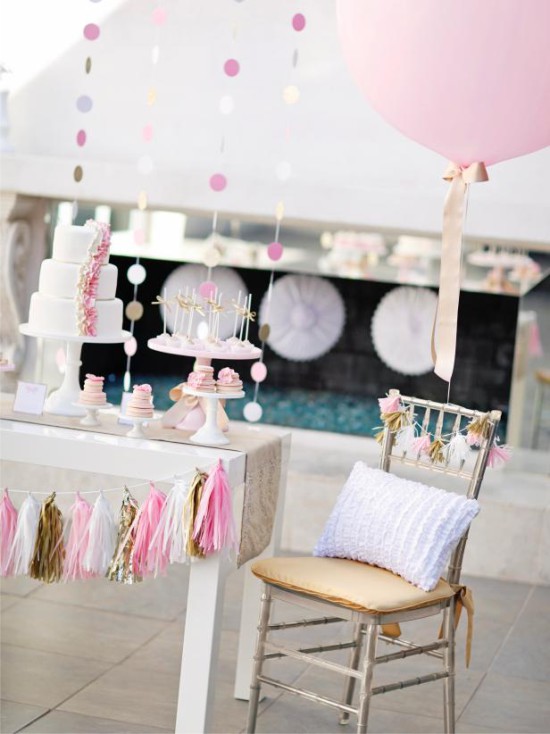
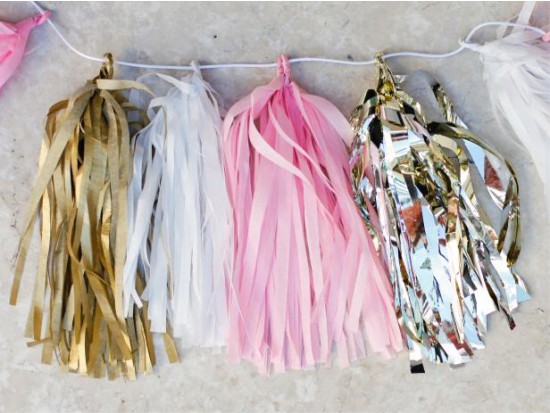
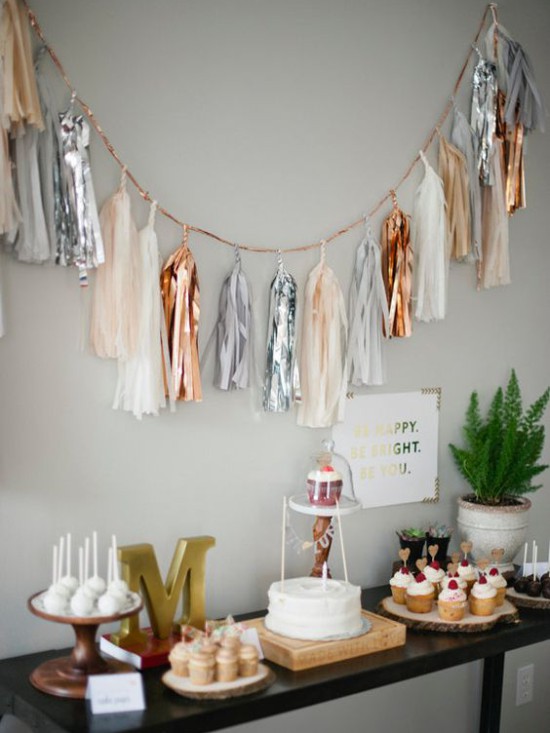
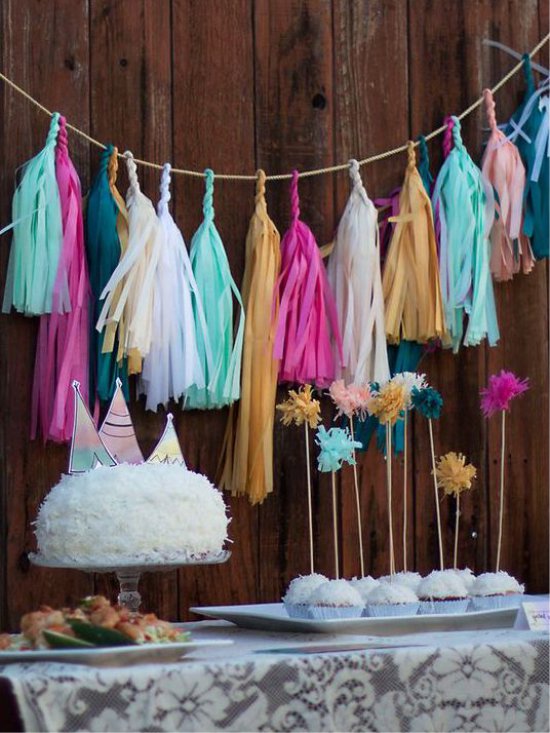
Tassels made from yarn or paper
And now we present the idea of making a garland with our own hands, which is the most fashionable attribute of a birthday or wedding celebration - a garland with tassels. From our master class you will learn how to make a large version of the decoration, but according to the same principle you can easily make mini brushes (eg, for decorating a Christmas tree) using smaller paper.
Instruction:
Prepare the following materials and tools:
- Tissue paper sheets 50 × 50 cm or 50 × 60 cm (for the manufacture of 2 brushes you need 1 sheet);
- Scissors;
- Tape.
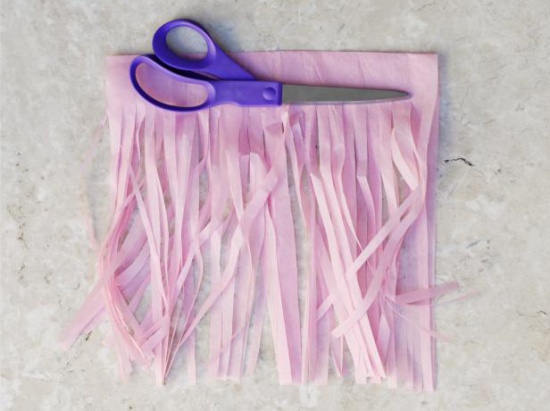
- Fold a sheet of tissue paper in half, then again in half, but in the other direction, to get a quarter.
- To create a fringe, start cutting your blank into strips (no wider than 1 cm wide) before reaching the fold line of about 2.5-3 cm.
- Now cut the quarter with a fringe into two halves along the fold line. You will get two blanks as in the photo below.
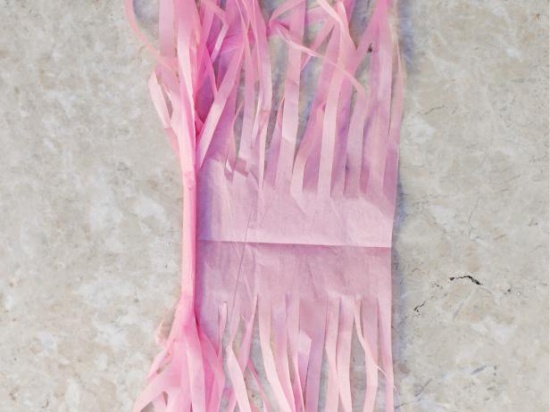
Single brush blank
- Expand one blank and start folding it tightly, as shown in the following photo.
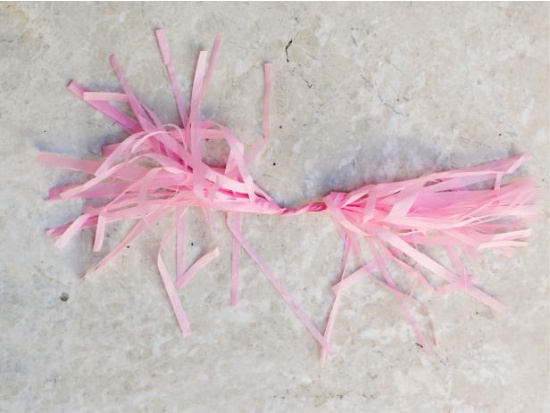
- When you completely fold the blank (see photo above), fold it in half, and then twist the two halves together to create a loop for hanging on the tape. Secure the loop with transparent glue (eg, PVA) or thread.
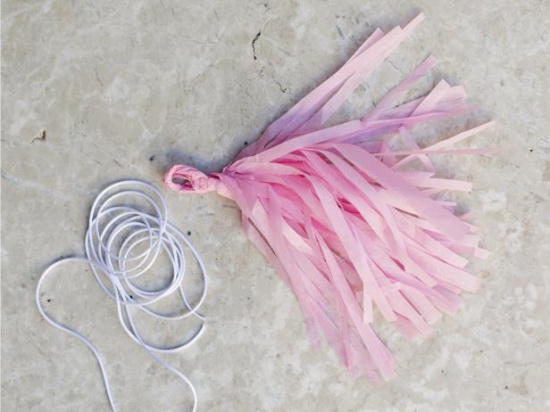
- Make a few more brushes of different colors and hang them on the ribbon.
In this video you can see a detailed master class on how to make a garland of tassels with your own hands.
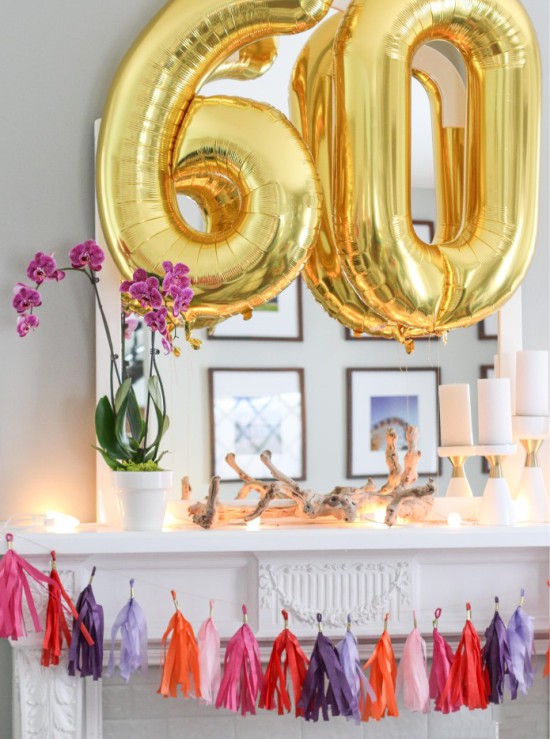
In the next selection of photos provided and other ideas garlands of tassels.
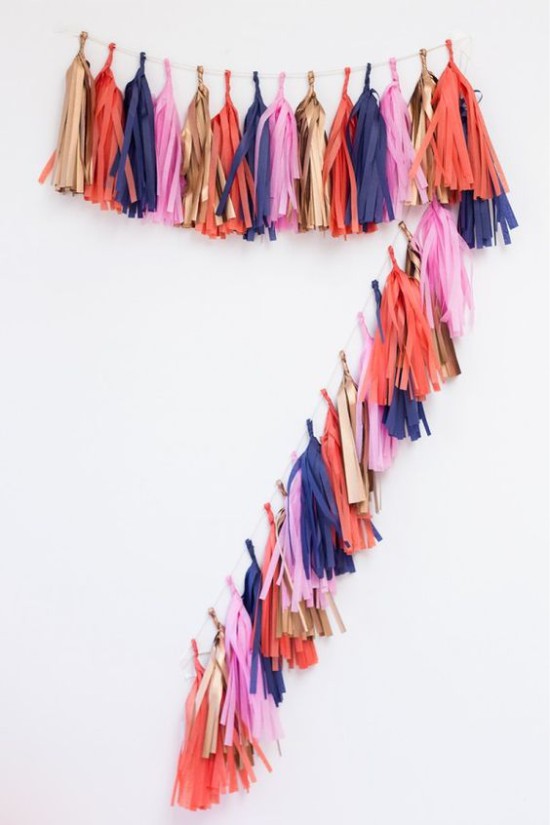
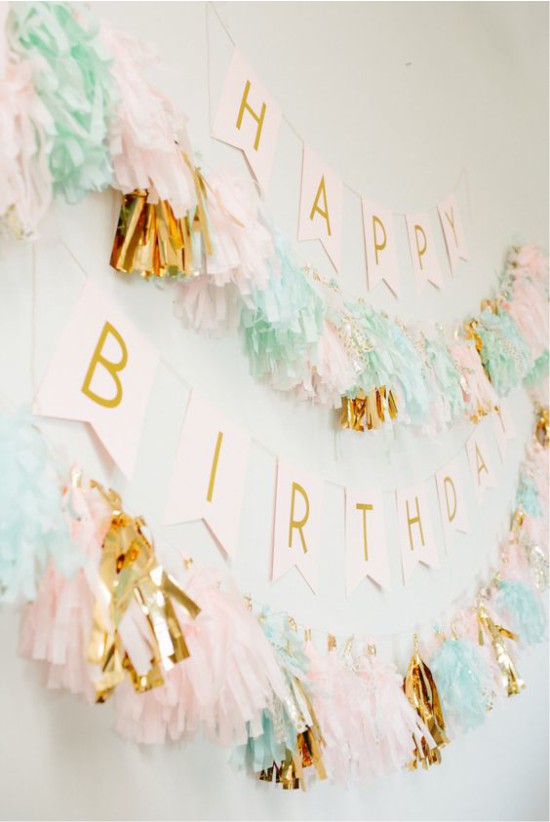
The idea of a birthday garland for a child
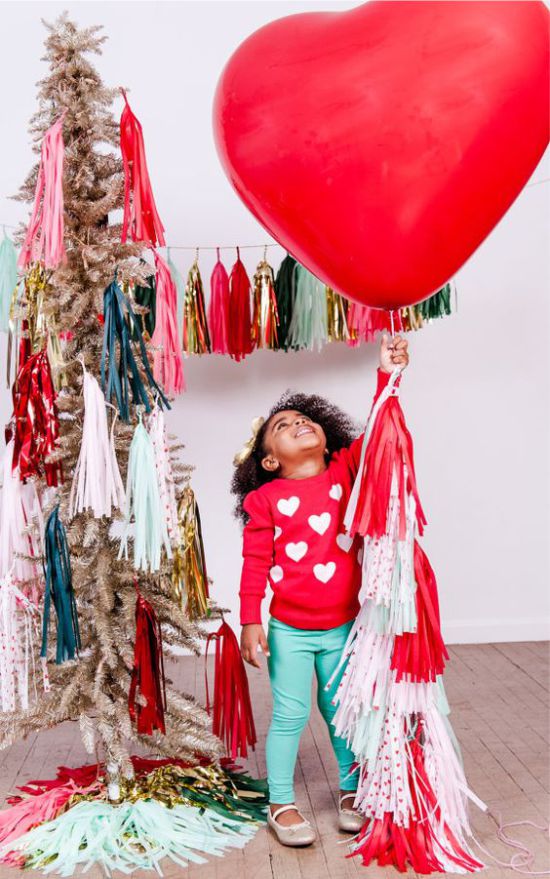
Christmas tree garland of tassels
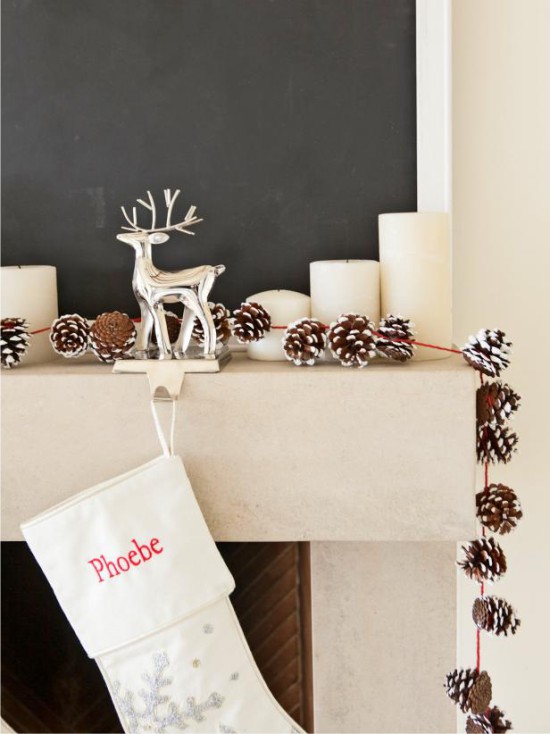
Pine cones in the "snow"
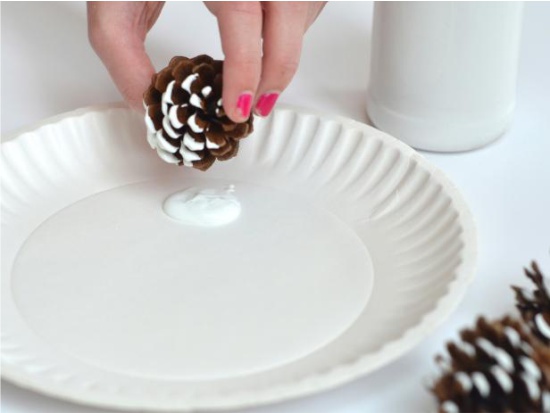
The garland of cones is a natural and durable decoration, especially relevant in autumn, in winter and, of course, in the New Year. You can simply take dry and clean bumps and tie them to, say, a jute rope. But in order for the garland to have a truly festive look, try to decorate the scales of cones with “snow” of any white paint. It's time to get out of the stock old white enamel!
Instruction:
- Pour a small amount of paint onto a paper plate and dip the bumps in it.
- Turn the cone so that each of its tips is covered with paint. Put the cone to dry and repeat with the remaining ones.
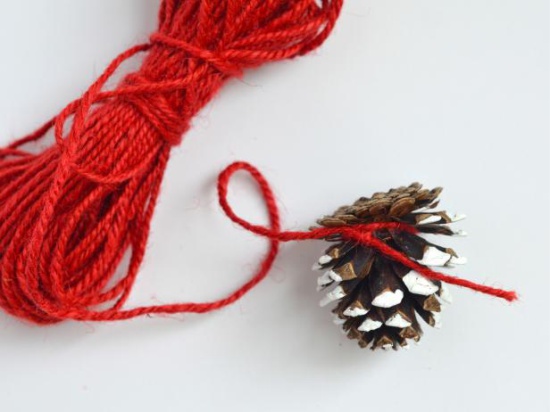
- When all the bumps are dry, proceed with their hanging on the thread. To do this, wrap the end of the thread around the bottom of the first bump and tie a knot. Then the second, third, and all other bumps also tie around their lower parts, and tie a small knot on the last “link” of the garland.
- Additionally fix the position of the cones with a hot glue gun.
There are other ideas for decorating cones. For example, they can be completely dyed (dilute the paint with water and dip each lump into it or simply use spray paint) and even stick on the tips of gold leaf, as shown in the photo below.
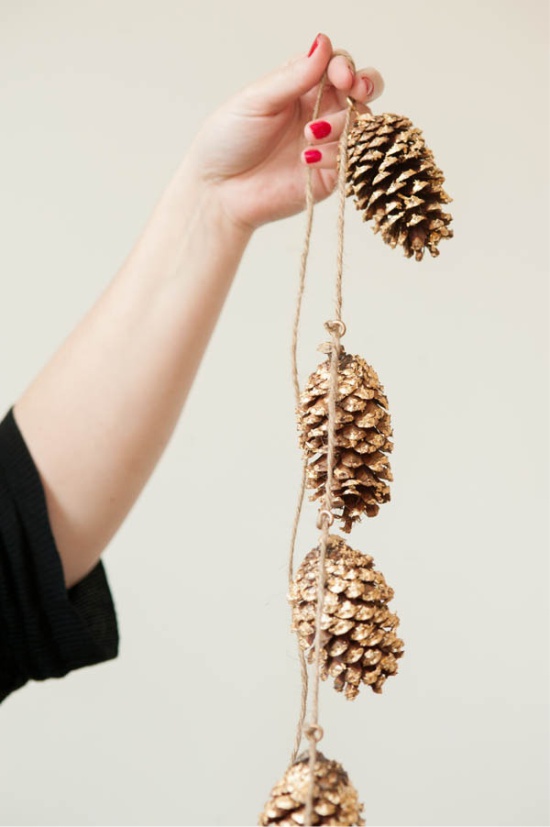
The idea of a cones of DIY cones
See also the material: Topiary made from cones, acorns and chestnuts - photo-ideas and 2 master classes.
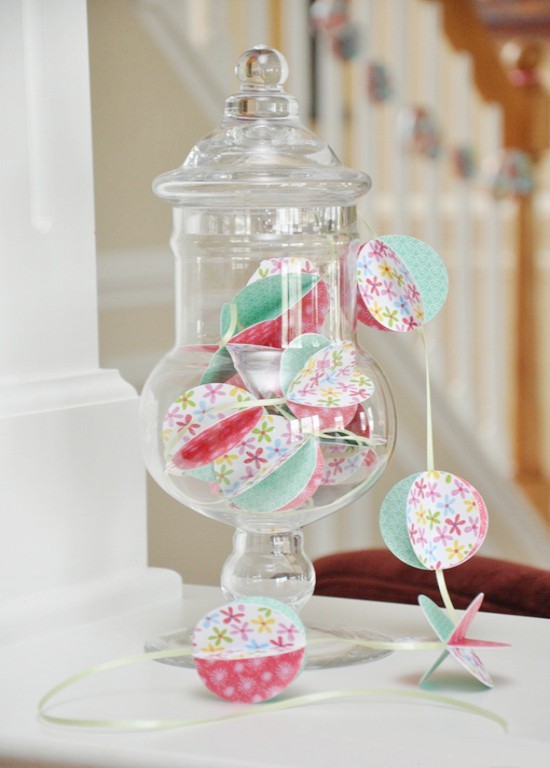
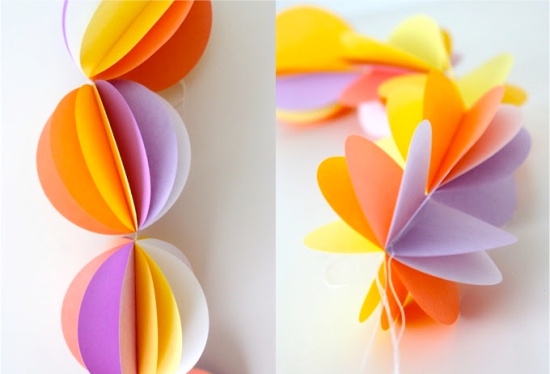
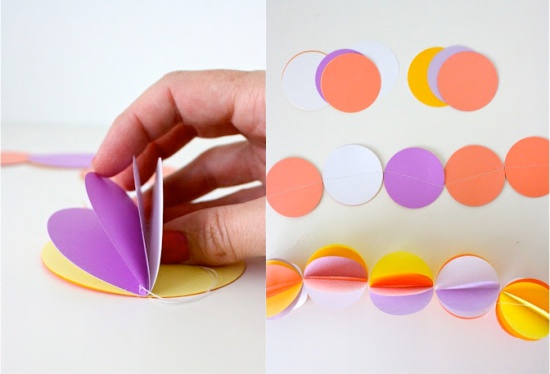
Ball garland
Balls of paper can be used to create as a Christmas garland with his own hands, and any other. It all depends on the colors you choose. To make a garland of balls with your own hands, you will need: glue or double-sided tape, beautiful paper (eg, colored or scrapbooking paper), scissors or a special hole punch for cutting circles.
Instruction:
- To make 1 ball, you need to cut out of paper 6 circles of the same diameter. However, you can cut from 3 to 16 circles for one ball. The more circles you use, the more voluminous it will be.
- Each circle bend in half so that the front side of the paper is inside.
- Now you can begin to form the ball. To do this, glue the resulting halves of the circles to the other side.
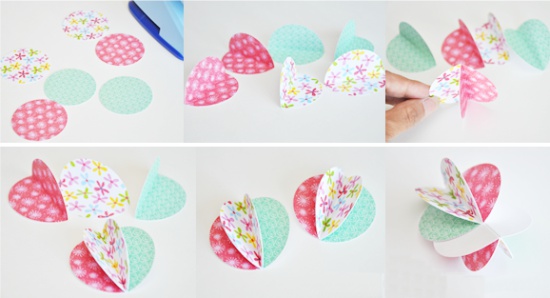
- Before glueing the last parts of the ball, pass the tape through its core.
- According to the described scheme, make a lot of balls and fasten all of them to the tape.

- If you have a sewing machine, you can speed up the process in the following way. Cut circles of medium-density colored paper (no more than 6 pieces per ball) and place them in stacks. Keep in mind that the paper should be colored on both sides. Next, in turn, stitch the stacks on a typewriter, and when the garland is completely “sewn”, simply straighten each semicircle of the ball. As a result, you should get about this decoration.
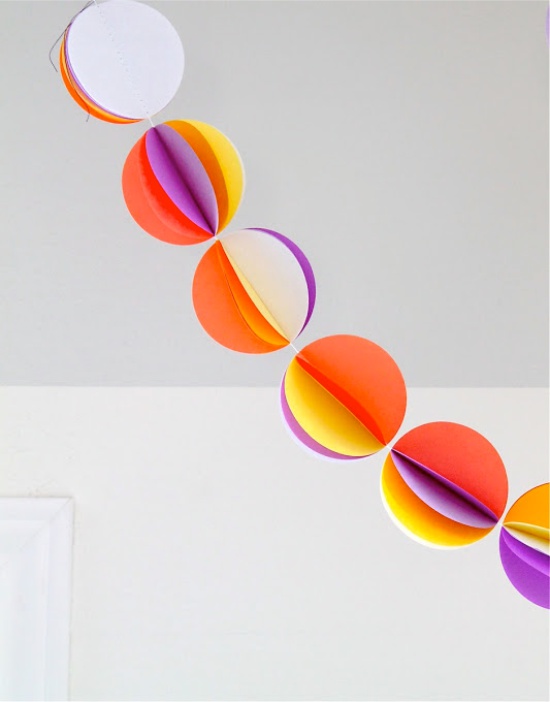
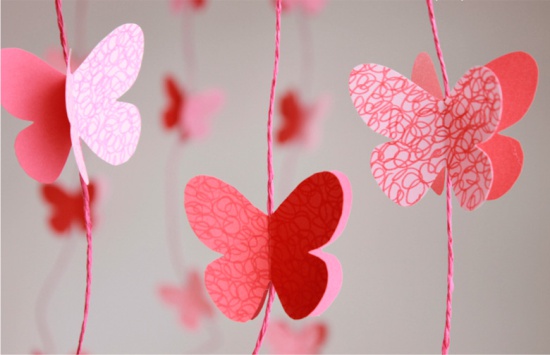
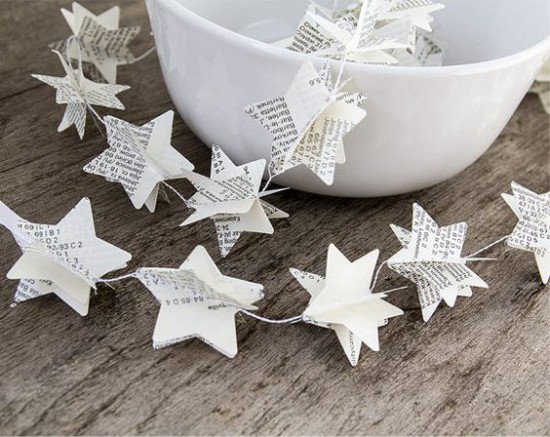
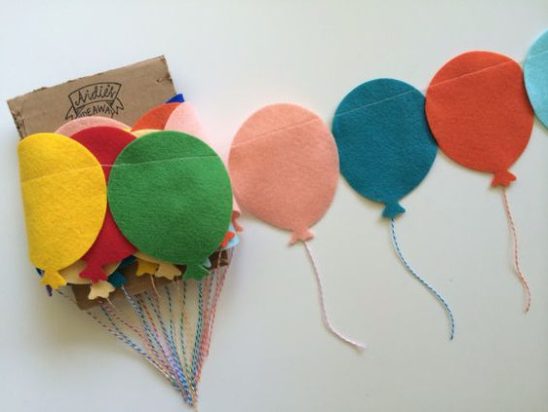
By the way, on the same principle, but using the parts cut out in a different form, you can create a garland of any subject.
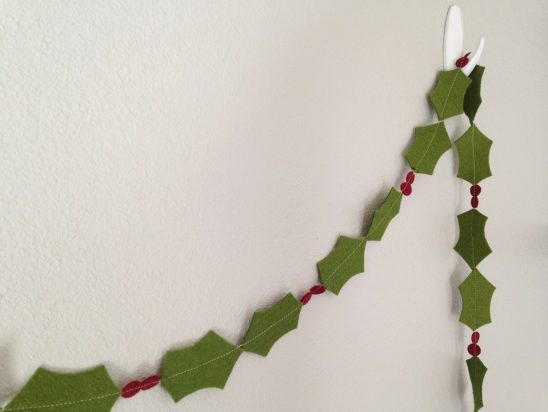
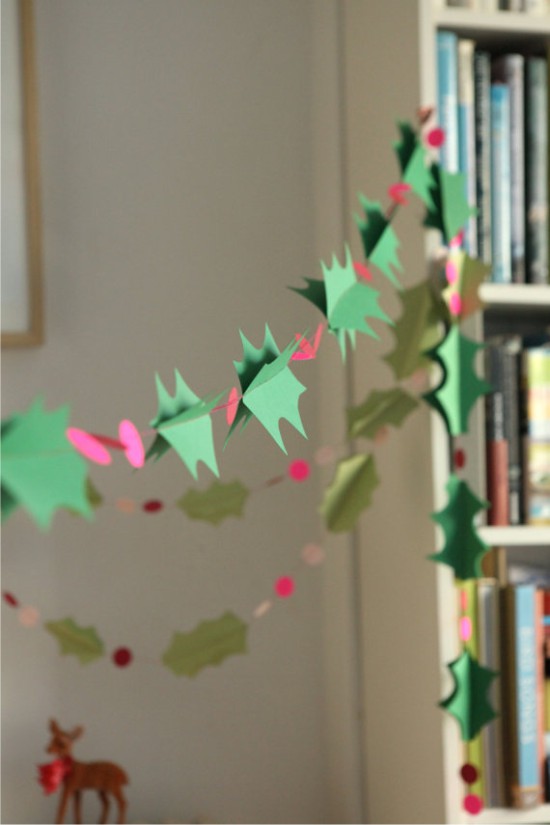 Christmas holly paper

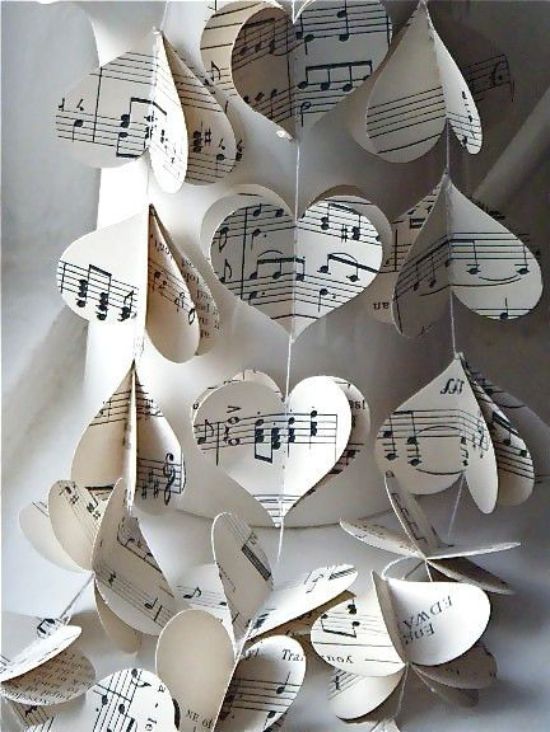 A garland of hearts, made with your own hands from sheets of sheet music
See also the material: 5 ideas and workshops on making handicrafts from napkins.
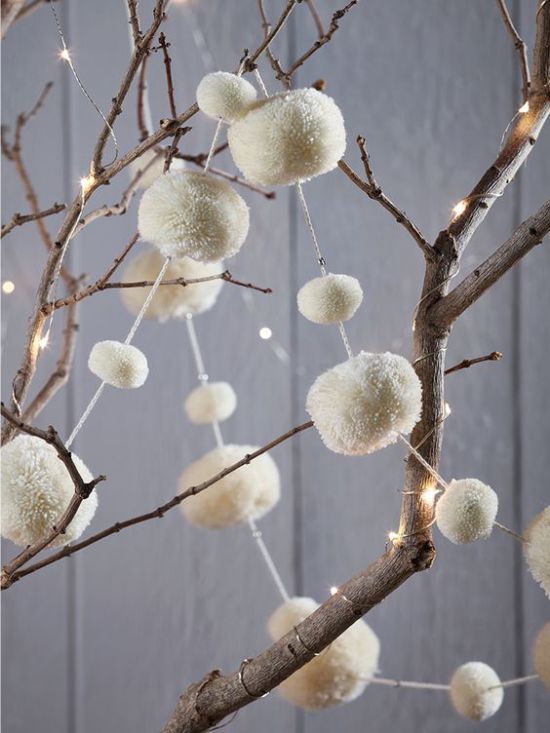
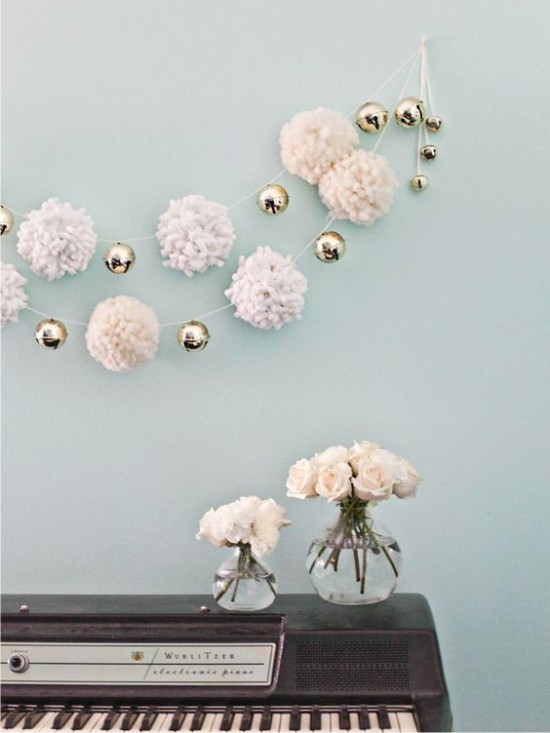
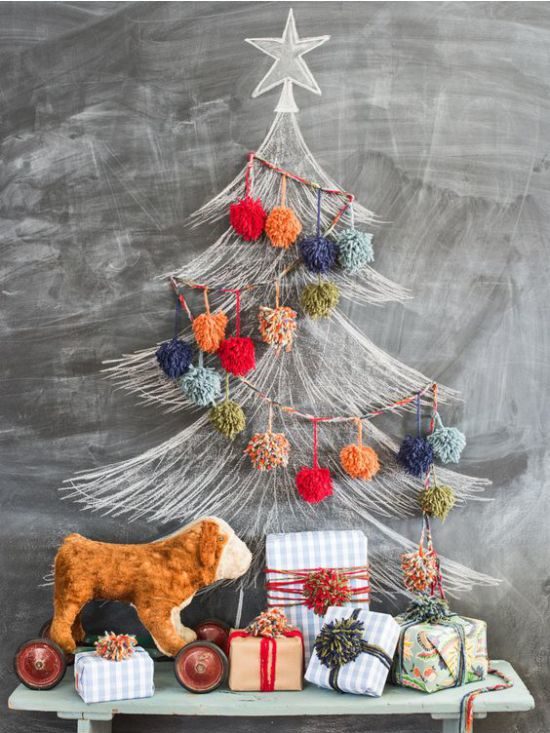
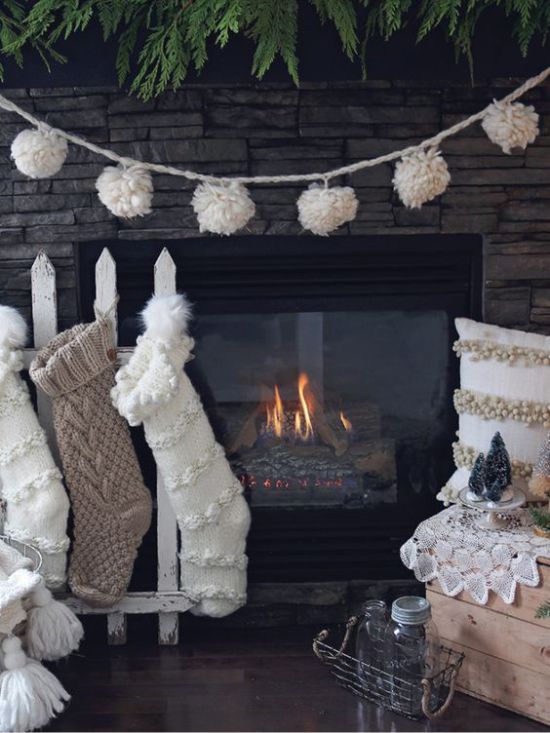
Yarn Pompons
Depending on what color of yarn you take, you can create a garland for any occasion. So, for example, on the New Year you can take white, red and green colors, on Halloween - orange and black, and if you take the skeins to the color scheme of the interior, you will receive a fashionable decor item.
Christmas tree garland from hand-made pompons
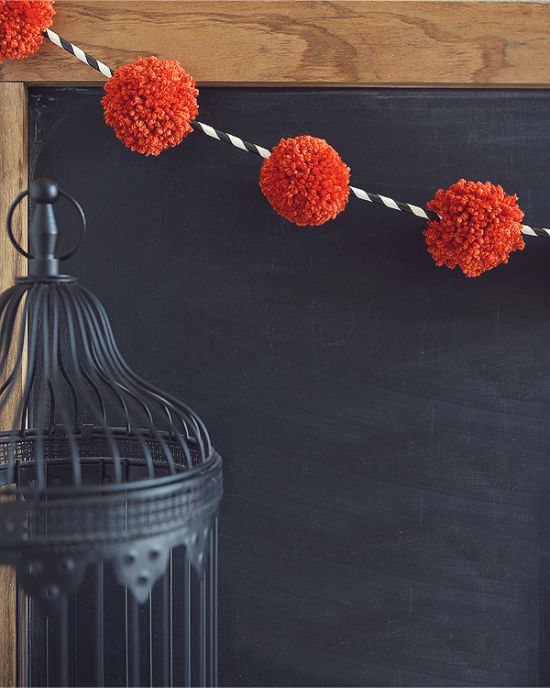
Halloween Pompom Garland
There are many ways to make pompons with your own hands, but the one that allows you to quickly make several balls at a time is best suited for a garland.
Instruction:
- Wind the yarn around the legs of the upturned chair as shown in the first top photo.
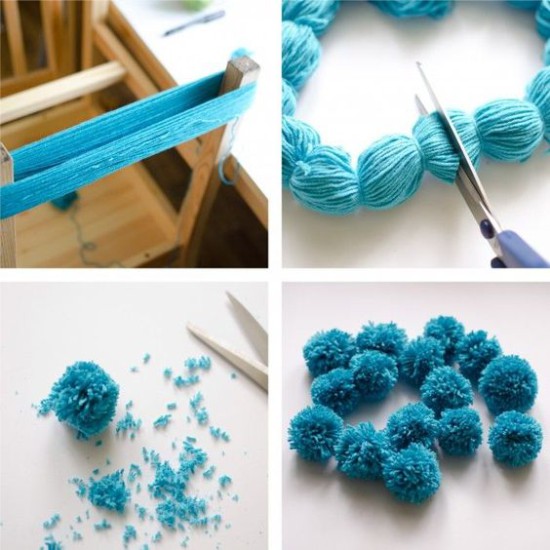
- Remove the resulting skein from the legs and tie it over the entire length with the remnants of the thread, maintaining an interval of about 5 cm.
- Then simply cut the skein into identical balls, so that each coil has a bandaged center.
- Trim the villi and flatten the balls, turning them into balls. If the balls are not enough, repeat the action with another skein.
- Attach the balls to the tape.
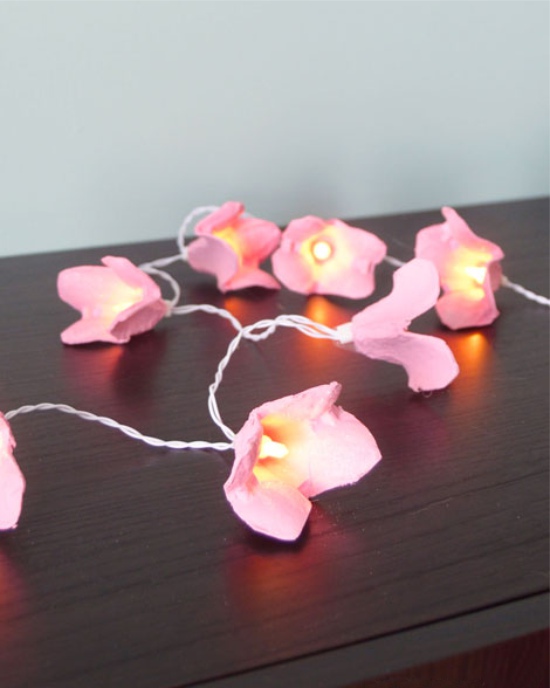
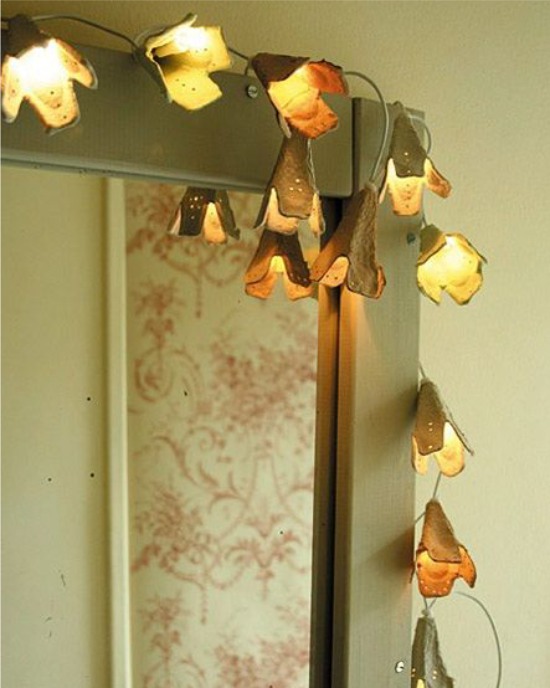
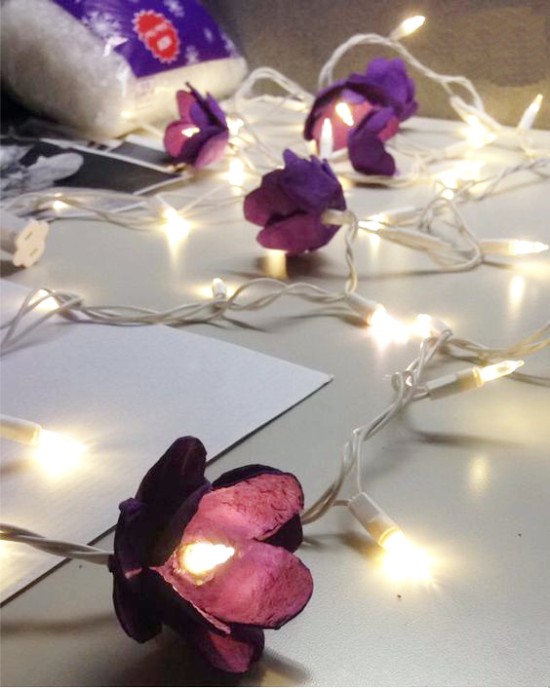
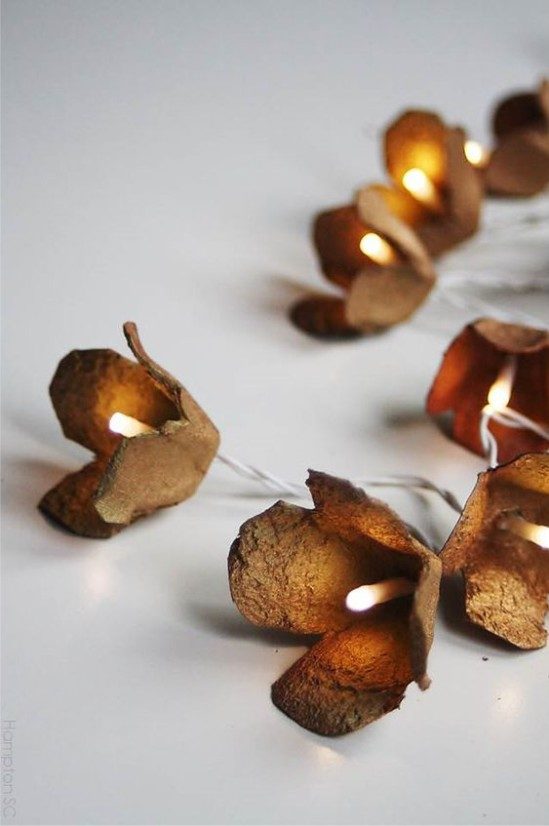
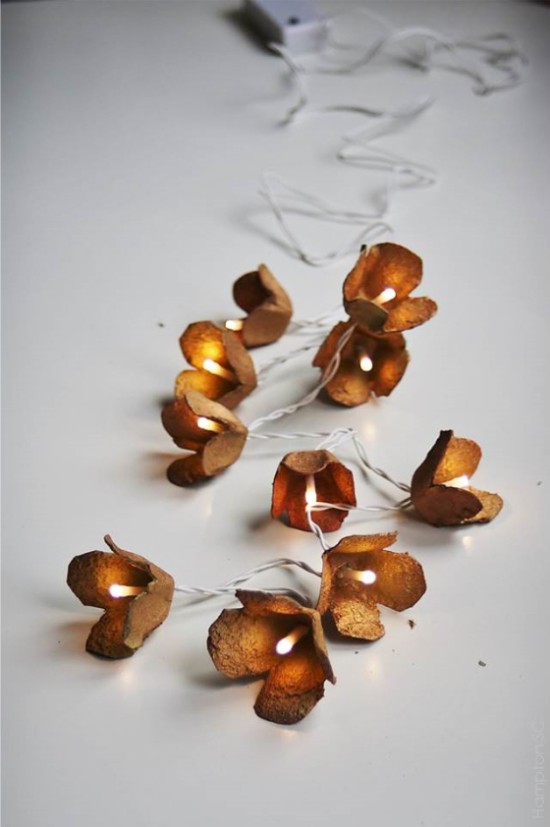
LED garland with flowers from the egg box
And now let's learn how to transform an ordinary LED garland with flowers from ... cells of the egg carton. The decoration will turn out not only beautiful, but also corresponding to the idea of recycling. Moreover, the box can be not only cardboard, but also plastic.
Instruction:
Prepare the following materials and tools:
- Packing from under the eggs (6-12 pcs.);
- LED garland;
- Acrylic paint (spray or can);
- Hot glue gun;
- Scissors;
- Stationery knife.
- Cut the lid of the box and set it aside.
- Using a knife, cut out the cells (for tulips) and / or the areas between the cells (for small or narrow elongated buds) of the box.
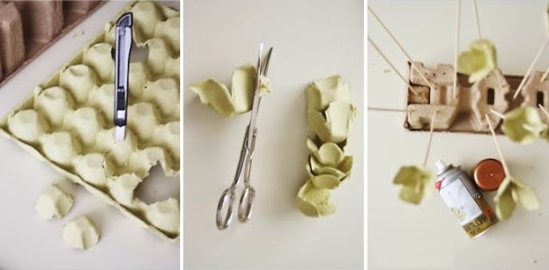
- With the help of scissors form the walls of the cells of the petals. Do not be afraid to experiment and cut the petals of different shapes and sizes.
- As soon as all the flowers are cut, start painting them. You can dry the flowers on wooden skewers stuck in the box lid.
- When the flowers are dry, cut a small cross in the bottom of each bud.
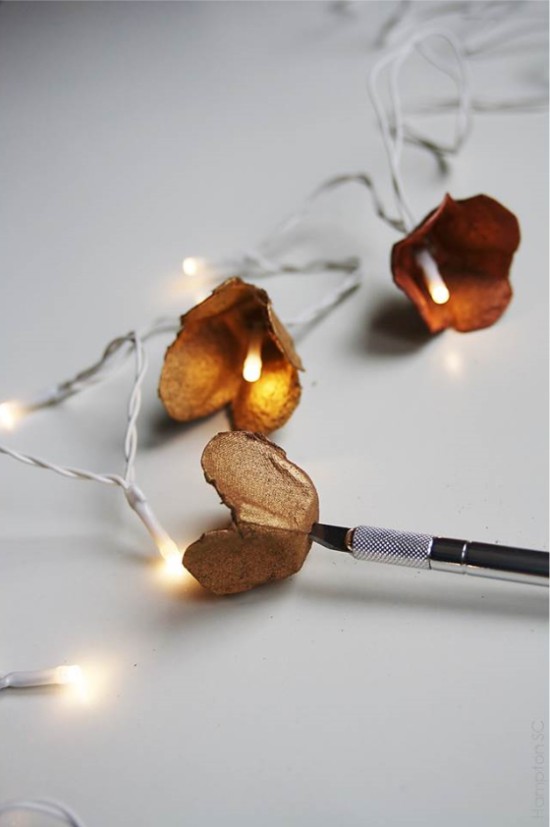
- Put a bud on each bulb of the LED garland.
- Now you can hang your garland of flowers in any desired place.
See also the material: DIY paper flowers - 4 workshops for beginners.
Paper Tissues
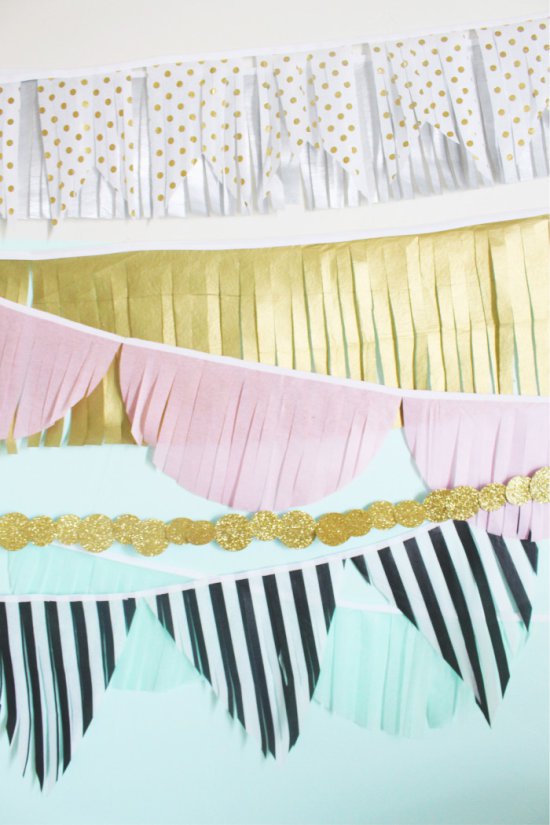
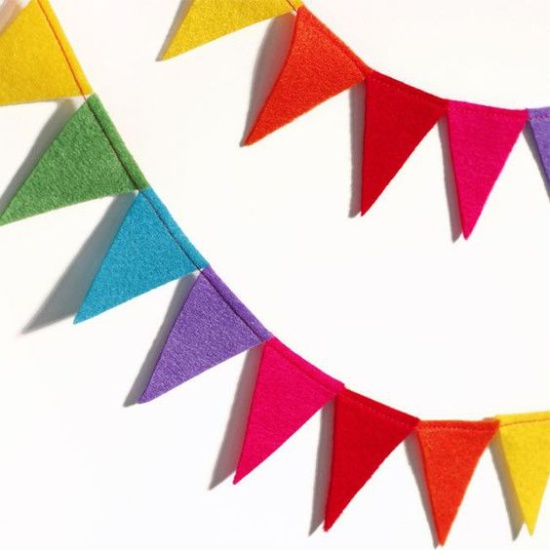
Bright colored flags on the ribbon - this is a classic decoration, appropriate for any holiday or just to decorate the interior. Today we offer to make it an updated version, namely from paper, quietness or tissue paper and with a fringe.
Instruction:
To make a garland of flags with your own hands you will need: paper of quietness / tissue paper of different colors, scissors, a pencil, a plate (any round object that can be cut around), a ruler, a tape that can be bent in half and glue-stick.
- Stack the paper and draw a circle on the top sheet with a plate.
- Without disassembling the stack, cut the circles. Then cut a stack of circles into halves.
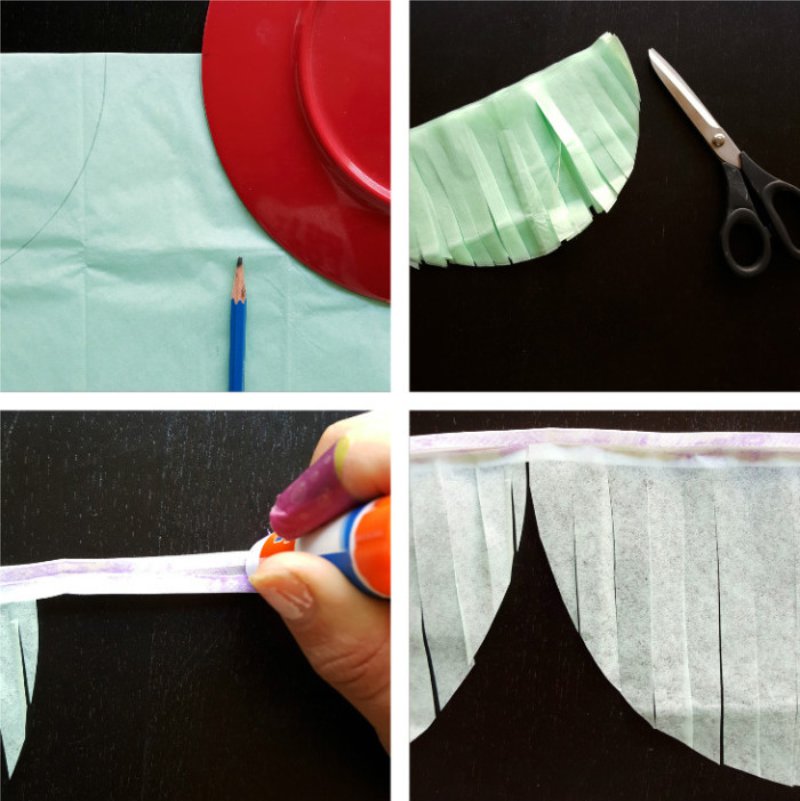
- Start creating fringe on the blanks. To do this, simply cut the semicircle into narrow strips, not reaching 1-1.5 cm to the upper edge and observing approximately the same interval.
- Now just paste the top edge of each semicircle onto the tape.
- On the same principle, make a garland of flags and pennants, but use paper of a different color.
Garland of pasta
Figured macaroni is practically ready parts of a garland which need only to be a little decorated and strung / fastened on a thread. For example, you can use butterflies (bows).
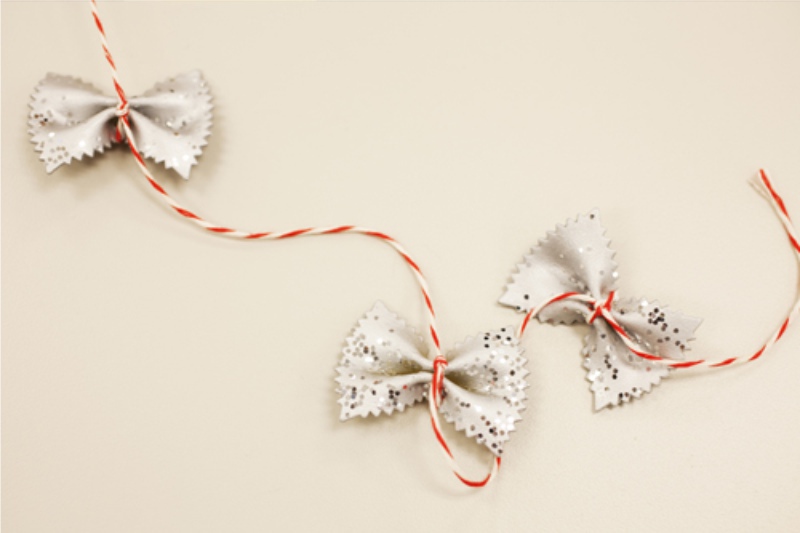
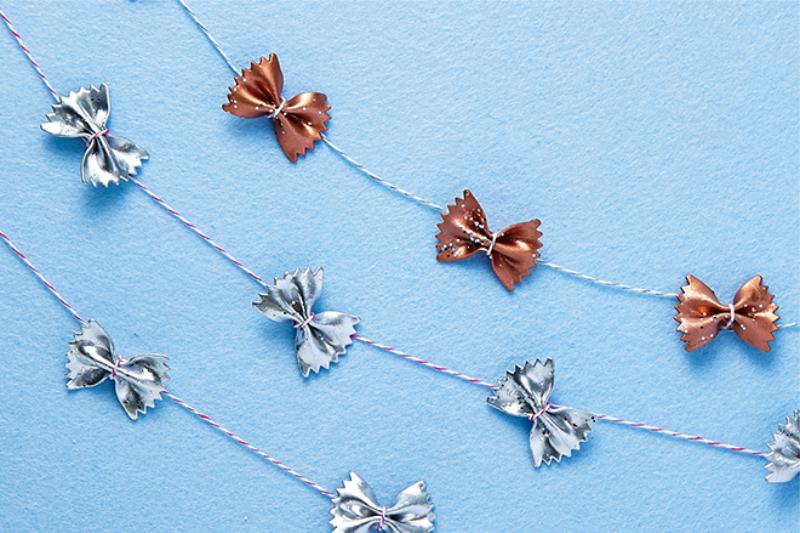
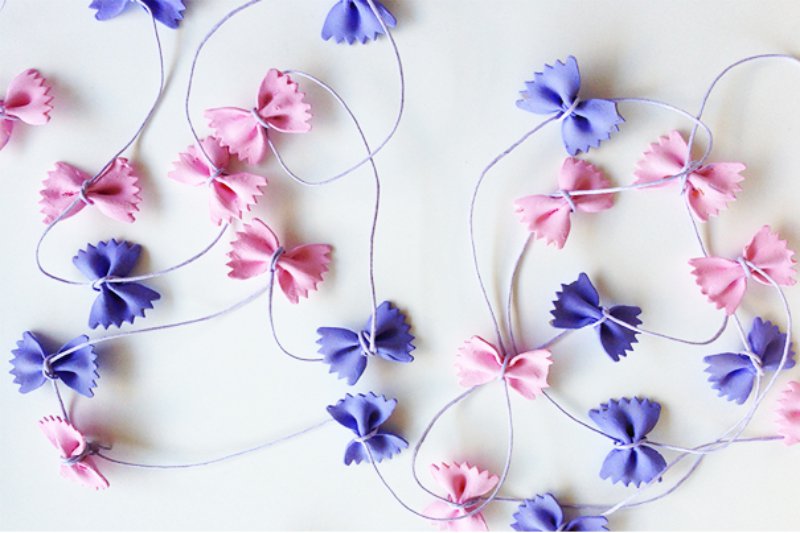
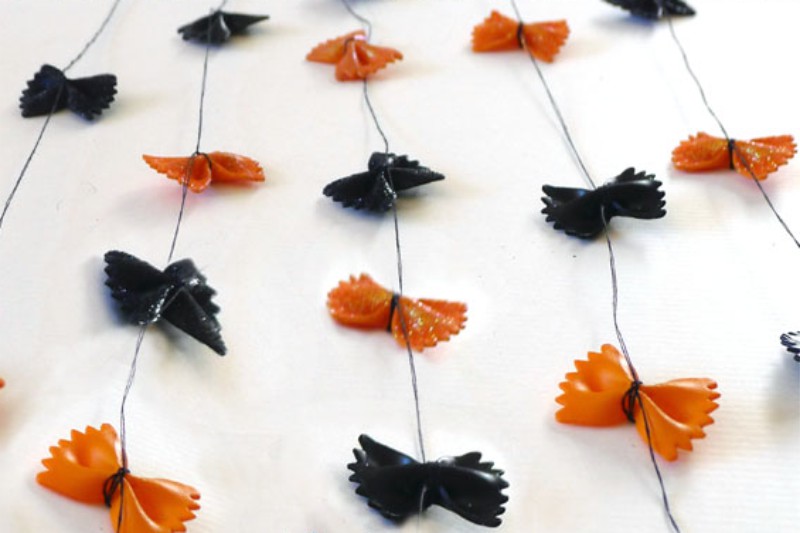
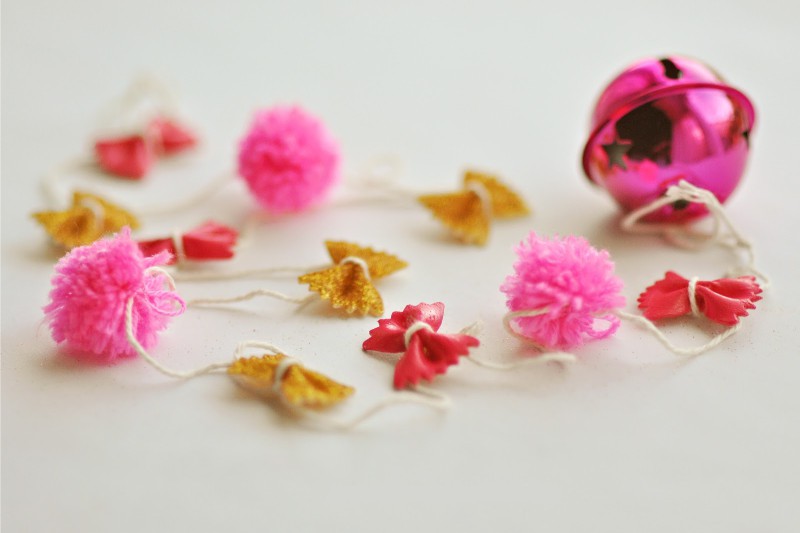
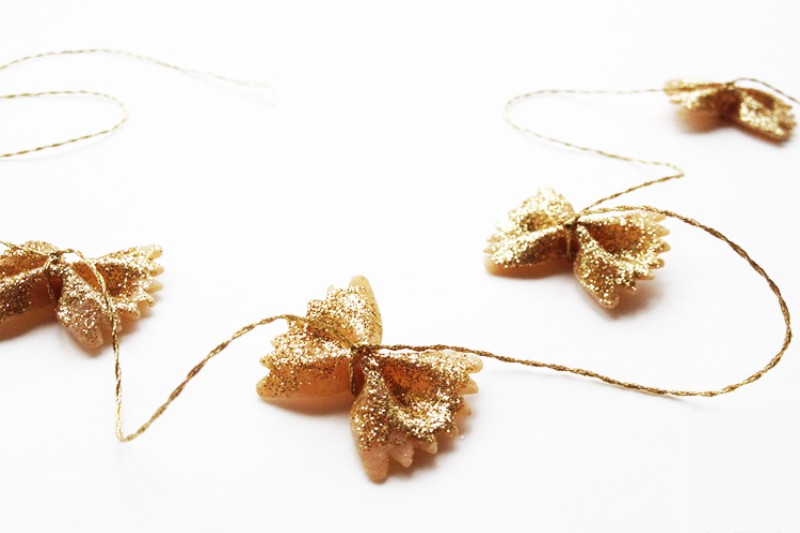
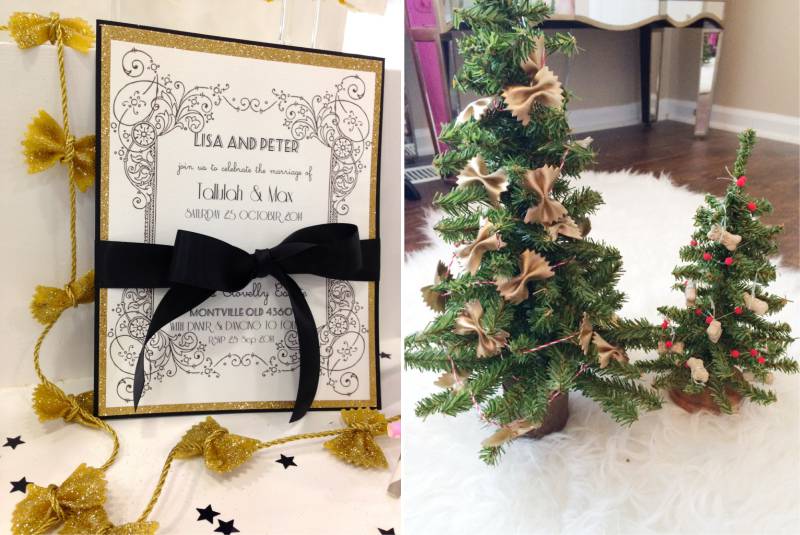
Instruction:
Prepare one or two packs of butterflies, paint, PVA glue, glitter and a nice thread.
- Paint the butterflies and let them dry.
- When the pasta is dry, brush it with white glue with a brush, then sprinkle it with glitter. Shake off excess material and allow the butterflies to dry out.
- Tie each macaroni to the rope.
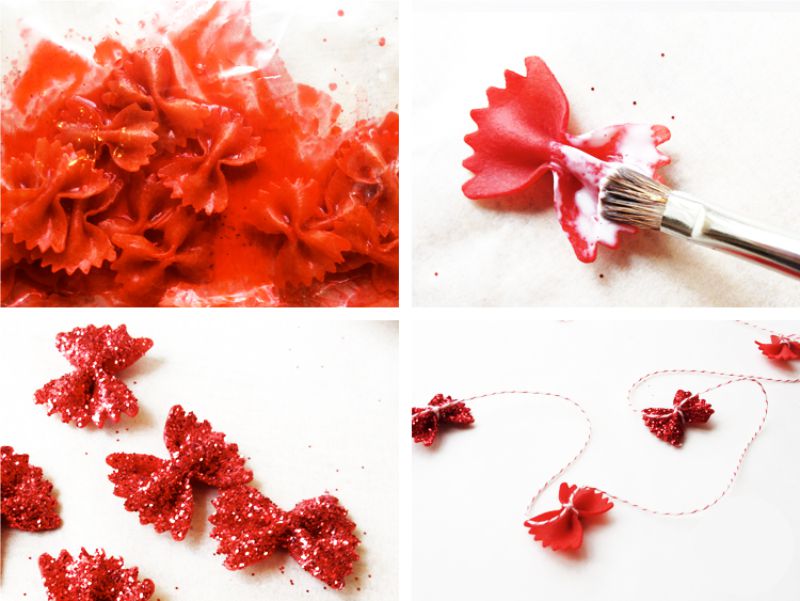
If you wish, you can replace the bows with any other curly pasta, for example, shells, tubules. Not only can you make a garland of bows, any curly pasta and tubules will do as in the photo below.
See also the material: Crafts from pasta - 15 ideas for adults and children.
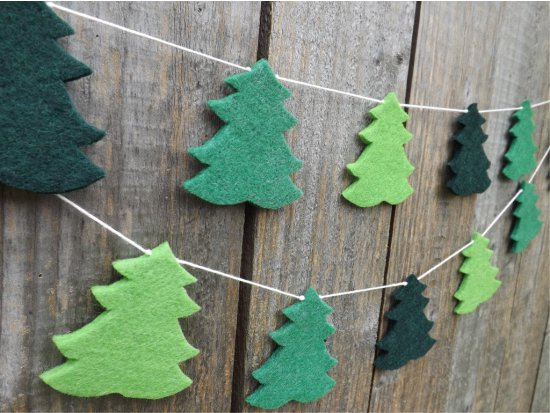
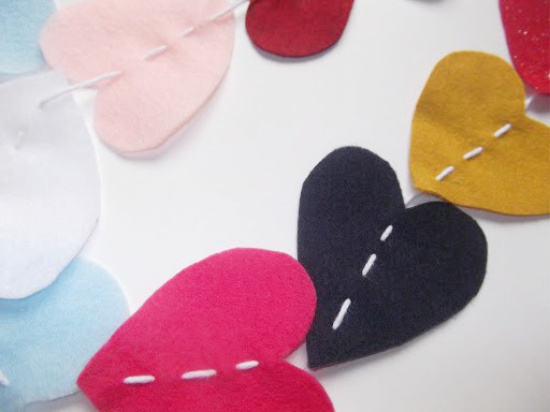
Felt garland
Felt does not crumble on the cut, keeps its shape and is sold in a variety of colors. Cutting from it, say, hearts or stars, you can connect them into a cute garland.
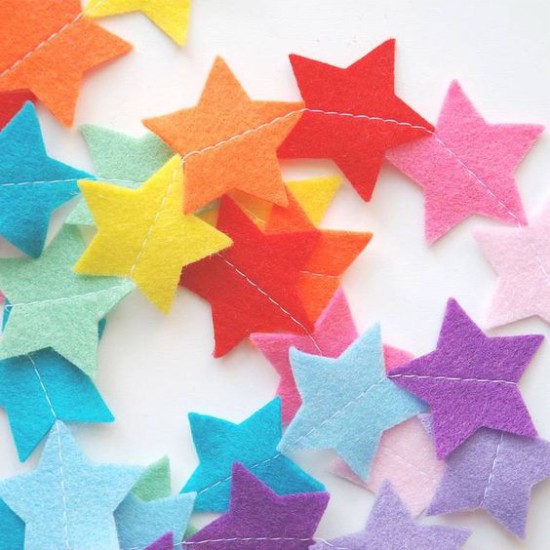
Instruction:
- Draw a pattern of the desired shape on cardboard or heavy paper and cut it.
- Pencil transfer the contours of the template on the sheets of felt.
- Cut out the details.
- Observing the desired sequence, sew all the details on a sewing machine or sew them with a contrasting thread by hand (see photo).
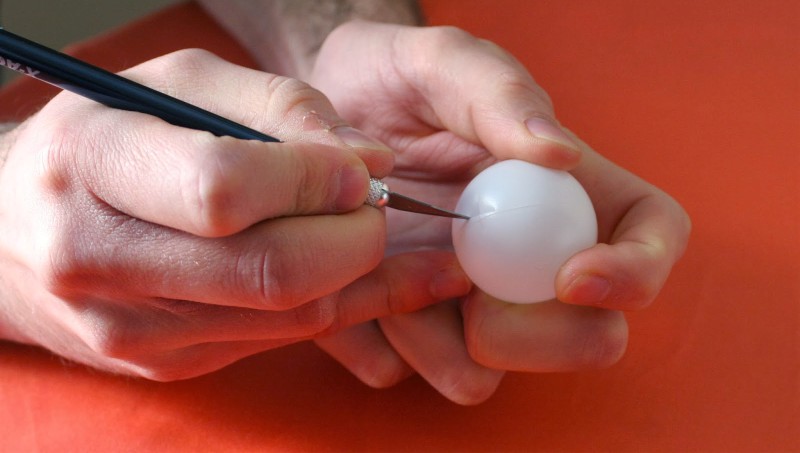
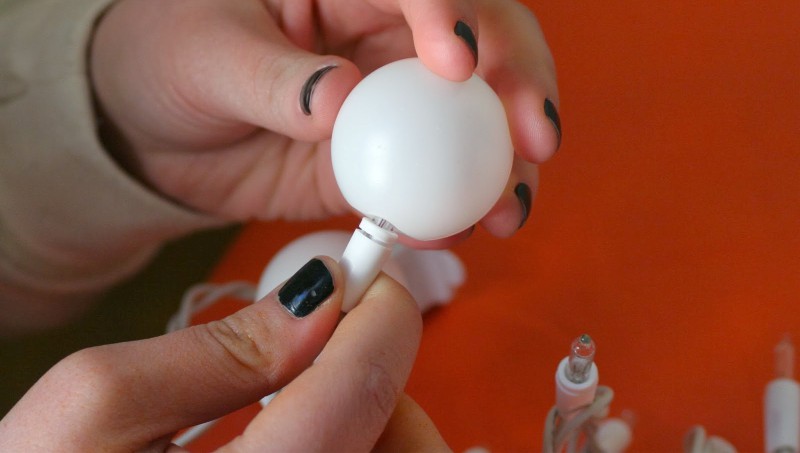
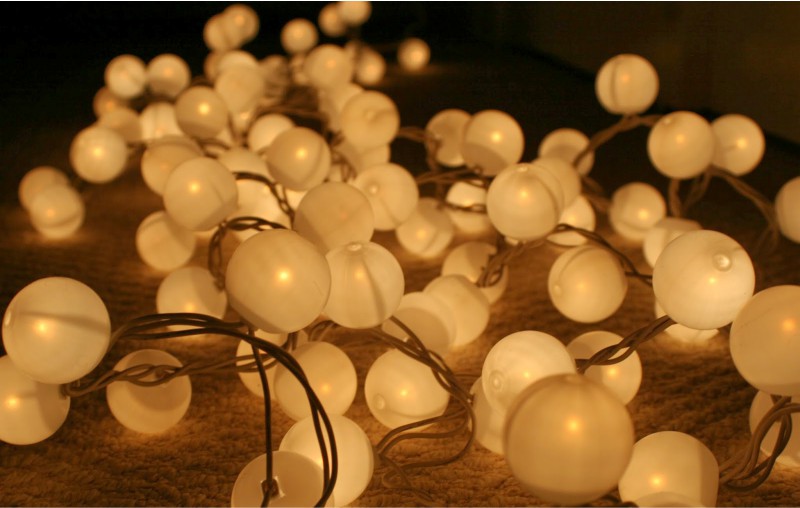
Garland with glowing balls
Small spheres that glow in the dark and seem to hang in the air look very impressive. To make such a garland, you will need to buy a large number of ping-pong balls, prepare a stationery knife (or better, a mock-up) and, of course, the electric garland itself.
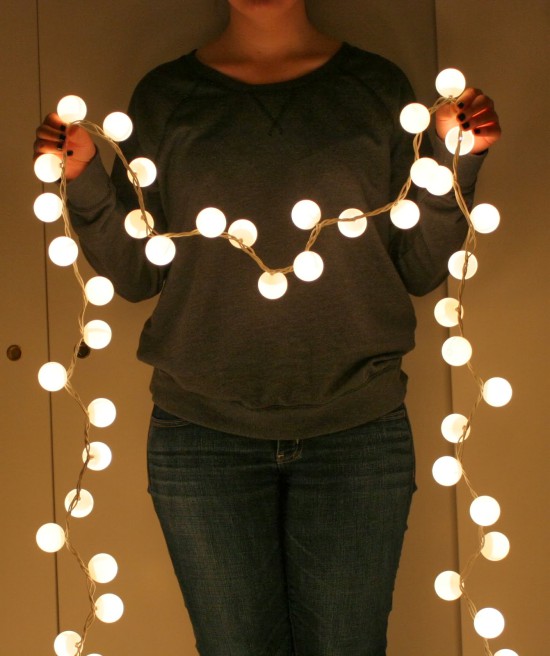
Instruction:
- Cut a cross on each ball with a knife.
- Put a ball on each bulb. Hooray! Garland is ready!
See also the material: 6 ideas of crafts in the form of roosters.

 (Rate the material! Already voted:16 average rating: 4,63 from 5)
- 9 ideas how to decorate the windows for the New Year
- How to make a candlestick with your own hands: 70 photos, 7 ideas and workshops
- We serve New Year's table: 6 steps to the holiday on your table
- New Year's kitchen decor: TOP - 10 best ideas
- Table setting - theory and practice in 6 steps
- 8 ways to decorate the refrigerator